

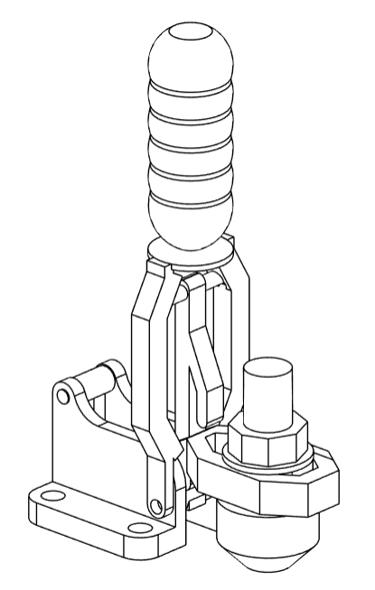
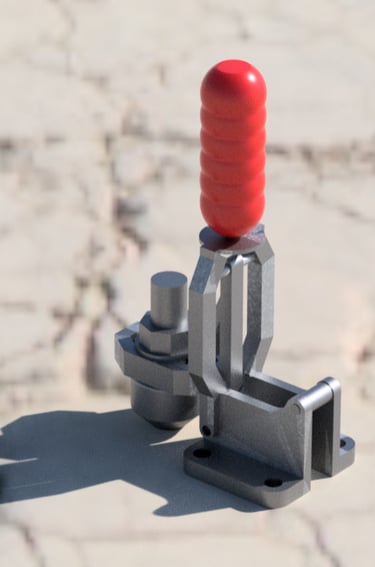
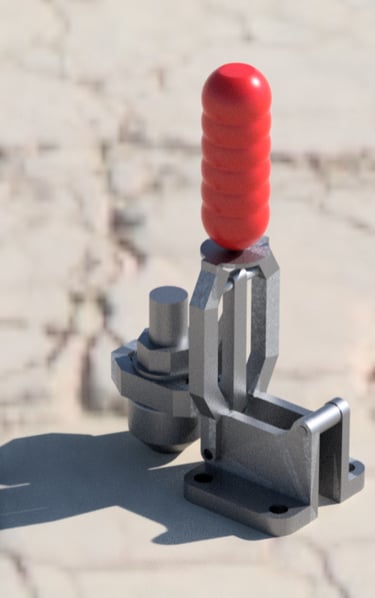
Vertical Hold-Down Toggle Clamp – U-Bar + Flange Base
3d model of a clamp used on a hard wall hvac duct for a clearspan structure at Randall's Island migrant camp.
Fusion 360 | AutoCAD 2026
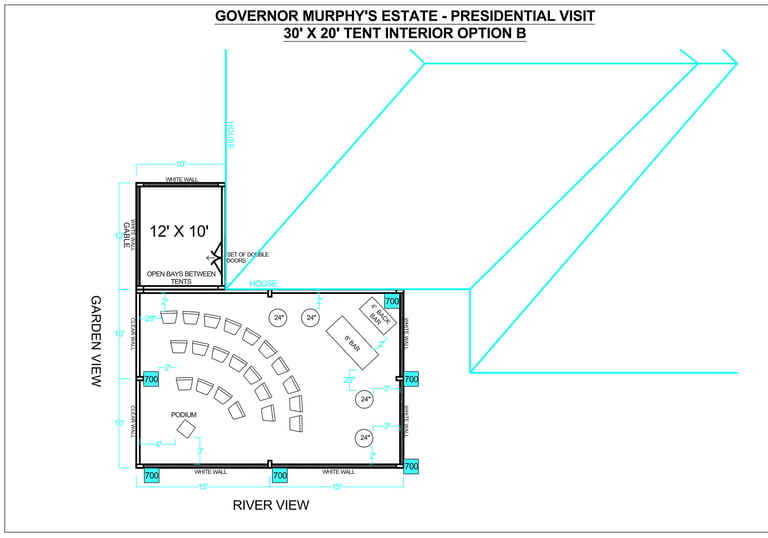
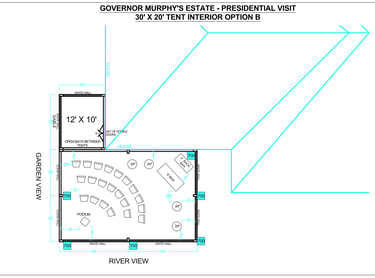
PRESIDENTIAL VISIT TO GOVERNOR MURPHY'S ESTATE-
Created for the secret service using Autocad, showing the top view of a clearspan tent structure designed for a presidential political event at the governors mansion.
AutoCAD 2026

Custom designed and 3d printed parts
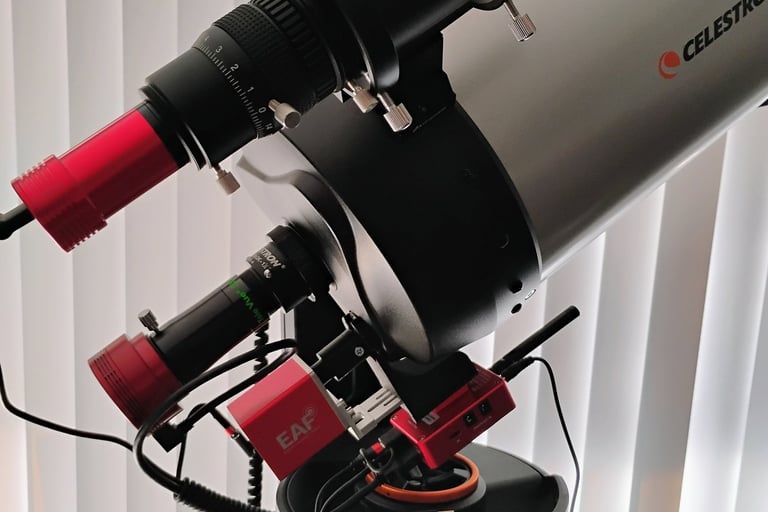


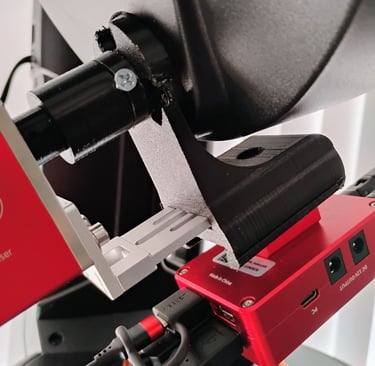
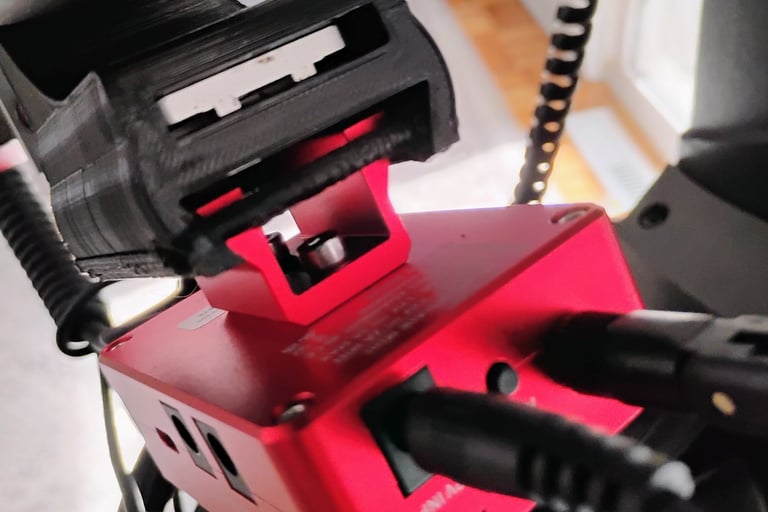
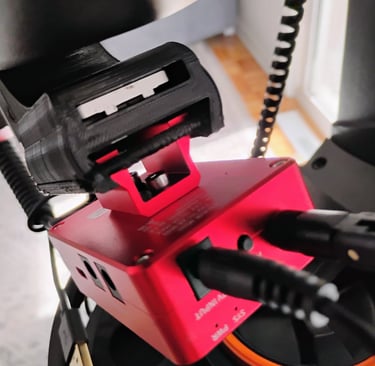
The first image shows the rear section of an astrophotography rig. The red component labeled "EAF" is an electronic automatic focuser that required a custom bracket and coupler to connect two different shaft sizes, while ensuring proper alignment and mounting strength to the scope. This bracket and coupler not only securely hold the EAF in place but also features an integrated dovetail beneath to accommodate a Wi-Fi module.
Image #1 - Mission success.
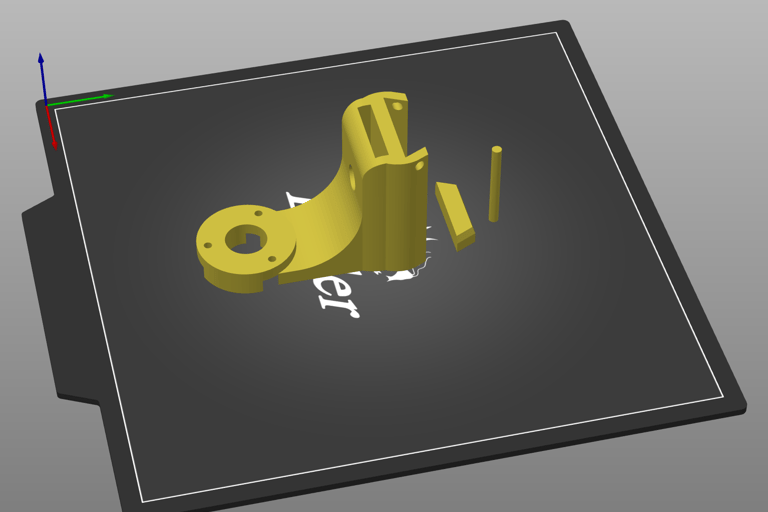
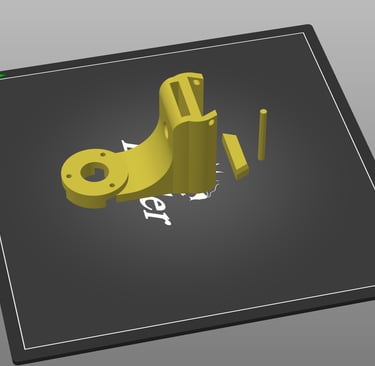
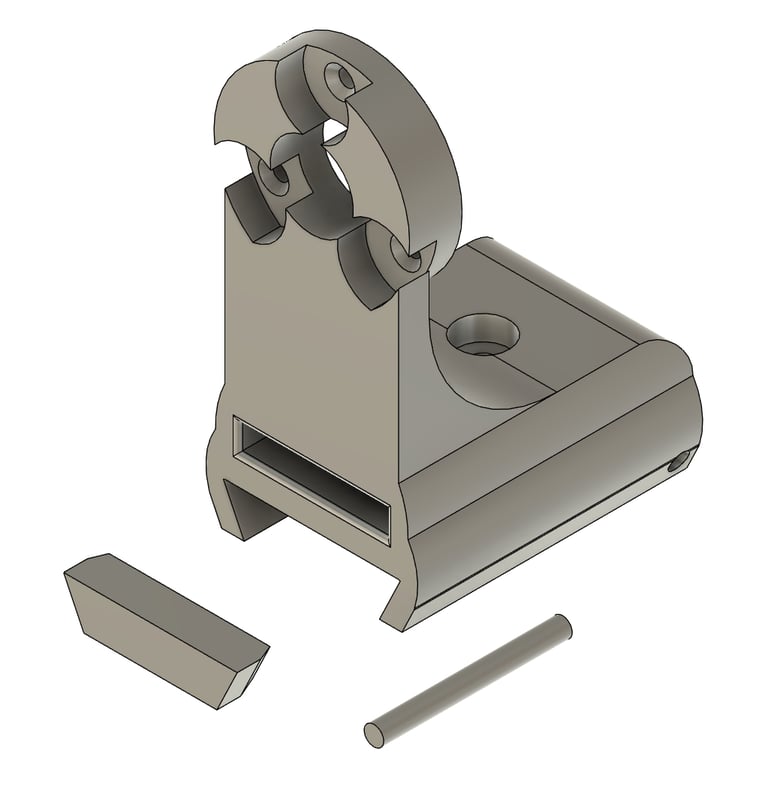
Image #2 - The image shows the custom 3D part fully designed and ready for printing.
Image #3 - 3d Model imported to Prusa slicer from Fusion360 laid out and ready to print.
Image #4 - Bracket and coupler successfully coupling 2 different size shafts to rotate in-sync.
Image #5 - Bracket has perfect fitment and dovetail design to hold the wifi module.


METLIFE STADIUM - FIFA WORLD CUP 2026 NJ BUS HUB
Elevation and leveling sheet for NJ Transit bus hub at the world cup.
Fusion 360 | AutoCAD 2026

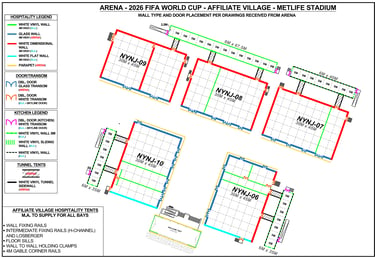
METLIFE STADIUM - FIFA WORLD CUP 2026 VILLAGES
2d Autocad sheet for Affiliate Village for the world cup.
Fusion 360 | AutoCAD 2026
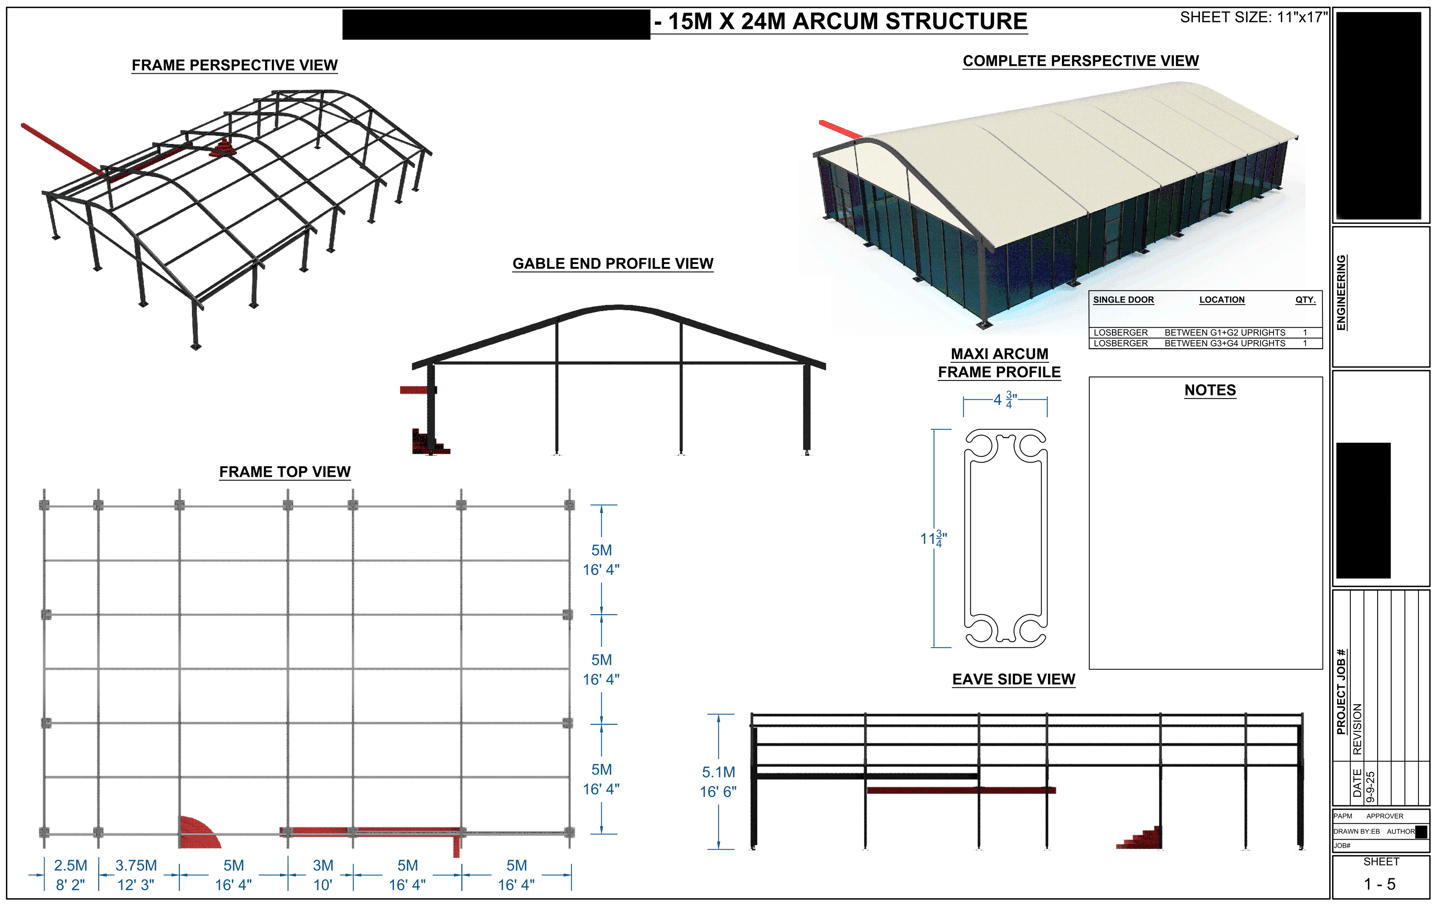
RESTARAUNT EXPANSION VIA ARCUM STRUCTURE
NYC restaraunt integrated a clearspan arcum struture to expand capacity.
Fusion 360 | AutoCAD 2026
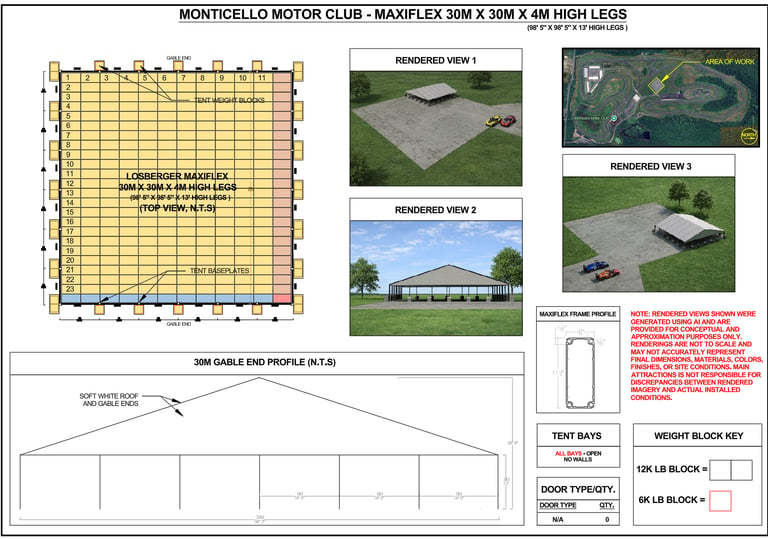
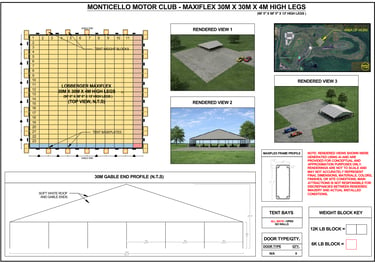
MONTICELLO MOTOR CLUB - STRUCTURE ON SKID PAD
Clearspan structure on a skid pad at the Monticello Motor Club in NY.
Fusion 360 | AutoCAD 2026
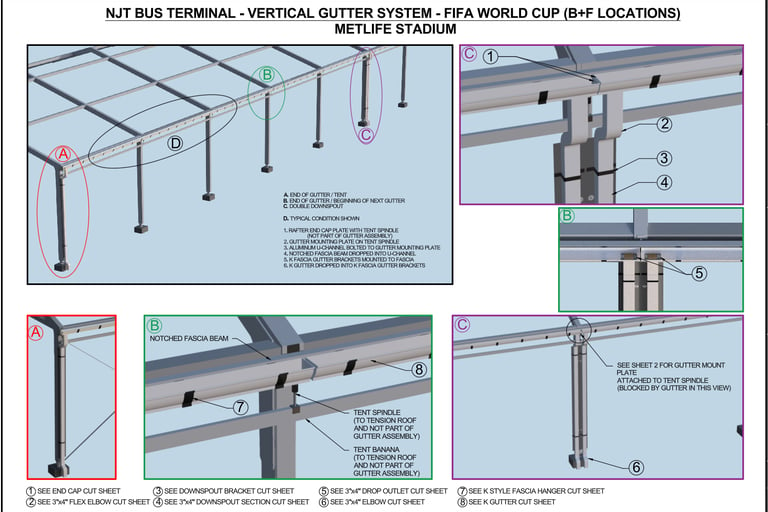
METLIFE STADIUM - FIFA WORLD CUP 2026 NJ BUS HUB
3d model for a custom rain gutter design for a NJ Transit bus hub for the world cup.
Fusion 360 | AutoCAD 2026